 coatpeg
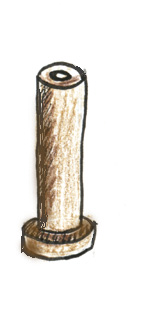 mug peg
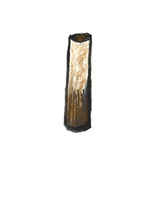 dowels
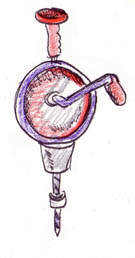 drill with 4mm bit
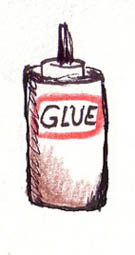 extra strong carpenter's glue.
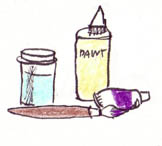 primer and coloured paint
It's true! You can make your own inexpensive bobbins suitable for working Torchon laces. You don't have to buy expensive bobbins imported from who knows where, everything you need is nearby. I found most the supplies in my local Michaels craft store, and the remainder I found at Home Depot.
Why did I make my own bobbins? When I wanted to learn bobbin lace I was quite dismayed by the cost of bobbins. Many patterns required more than twelve pairs, and most outlets sold them in bundles of ten pairs. Other places sold them as pairs, for more money of course! So I bought a pair and carefully examined them. As I examined them I said, "I bet I can make them myself! After all...I'm a Kreative Kat and Kreative Kats can make anything!"
After a bit of trial and error I worked out these wonderful bobbins. They're a bit larger than standard Torchon bobbins, but they fit in the hand nicely so there's no cramping up when you're working with them. I discovered they were easier to keep them in order on the pillow at the beginning of my lace making journey. And as a bonus they can be painted and decorated however your Kreative little heart desires. And because they are less expensive than the expensive one from the lace shops, you have more pairs and you can make wider and more complex laces.
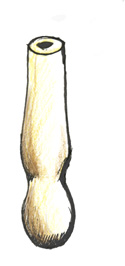
| figure 1 | coatpeg | This is the shape of the coatpeg. it measures about nine cm long. |
| figure 2 | mug peg | This is the shape of the mug peg. It is about 4.5 cm long and narrower than the coat peg |
| figure 3 | dowels | this is the dowels. They are 4mm wide and cut into 2cm lengths. |
| figure 4 | drill with 4mm bit | Drill with a 4mm bit |
| figure 5 | extra strong carpenter's glue. | Extra strength carpenter's glue. I used Lepages Outdoor Waterproof Glue. |
| figure 5 | primer and coloured paint | Acrylic primer and coloured paint, whatever you desire. |
The coat pegs should be large enough to work with but not too large that they don't fit on a lace pillow. They should be about 9cm long, rounded and feel comfortable in the hands. They should be about 1.5 cm wide, to handle the drilling for the dowels. The mug pegs should be narrower so the thread has a place to go. The ones I used were 1cm wide by 4.5cm long with a little knob on the top. The doweling came in one length which I cut down to size. The doweling is essential! Without the dowel inserted into the pegs they won't stay together. They will separate into two parts! Trust me...I learned this the hard way!
I use an old fashioned hand drill from Michael's. It's made by Fiskars and it is sturdy, easy to use and mine came with a purple cushioned grip. Try and find THAT at the Local Home Hardware! I clamped the pegs into a workmate-style bench and drilled down about a centimeter. I wrapped tape around the drill bit so I knew when to stop. I repeated the drilling with the mug pegs. Be sure to drill straight down! You don't want the bit to come splintering out the side!
Drop a blob of glue onto the drilled hole in the coat peg. Push the dowel into the hole. Wipe up the excess glue. Let the glue dry. When dry, drop a blob of glue into the drilled hole in the mug peg. Push the dowel attached to the coat peg into the mug peg. Wipe up the excess glue and let dry.
When the glue is dry, you are ready to make your bobbins look pretty. Start by sanding lightly, to get rid of rough, splintery spots. Give the bobbins a coat of acrylic primer. Ceramacoat makes a good primer, and you can buy it small bottles. When the primer is dry you can paint and decorate the bobbins however you choose. I would recommend painting the mug pegs, which hold the threads, in a good semi gloss acrylic paint, and make sure the surface is smooth so there's nothing to snag the threads on. Pale blue is easy on the eyes and contrasts with the most commonly used thread colours of beige and white.
Wind the thread on the mug peg part and secure with a half hitch knot. I made these to learn Torchon lace, using Coats "Opera" thread in 10 and 20 thickness. I've used mine for several years and I have made many yard of laces.
| figure 1 | 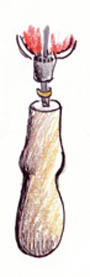 coatpeg coatpeg | Drill a hole in the coat pegs. The hole should be 4mm wide by one cm deep. Drill straight down, not at an angle. do the same with the smaller mug peg. |
| figure 2 | 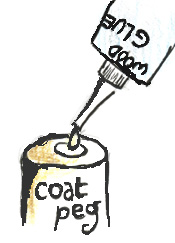 mug peg mug peg | Pour a generous amount of glue into the hole of the coat peg. |
| figure 3 | 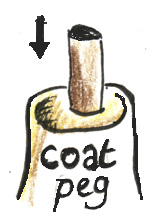 glue glue | Slide the dowel into the hole and hold for a few seconds until the glue sets a bit. |
| figure 4 | 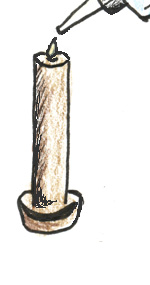 glue peg glue peg | now fill the mug peg hole with glue. |
| figure 5 | 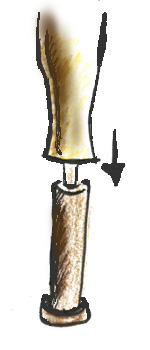 allow to dry allow to dry | Insert the dowel ataached to the coat peg. Hold for a few moments until the glue begins to set. wipe up excess glue. Give your bobbins a full twenty-four hours for the glue to dry. |
| figure 6 | 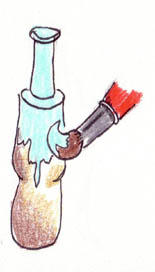 prime and paint prime and paint | Cover with one coat of acrylic primer and allow to dry. Then paint your bobbins any colour you wish! |
| figure 7 | 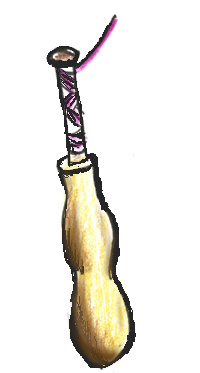 wind on thread wind on thread | fill your bobbin with any type of suitable thread. My favourite is "Opera" by Coats. It makes a nice sturdy washable lace that take well to dyeing. |
Now, you'll need a few more thing to make lace, such as a pillow, pins and thread. Click on the link at the bottom of the page to go to the next page, You'll find what you need there!
Coming soon! Diagrams of my favourite laces, including "Spiders and Flies" an insertion lace and "Ruffled Fan", my first edging. I designed both for specific uses, to embellish a peasant blouse I designed and made to showcase the types of lace that I make.
Please note that these bobbins are not suitable for fine laces such as Honiton lace. Honiton must be worked with the traditional fine, pointed-end bobbins because of the fineness of the thread and the countless sewings that are part of Honiton lace.